Opening a beading pattern file for the first time can feel a bit confusing—there are grids, letters, numbers, and sometimes multiple pages of instructions. But once you understand how everything is structured, it all starts to make sense.
Whether you’re working with loom beading or peyote stitch, most pattern PDFs follow a similar logic. Let’s walk through it together in a simple, human-friendly way.
What’s Inside a Beading Pattern File?
A beading pattern PDF is basically your roadmap. It tells you what to use, how many beads you’ll need, and exactly how to place them.
Most files include:
- Basic project info (size, technique, number of colors)
- A bead legend (color key)
- A visual chart (grid)
- A word chart (written instructions)
Even though designs vary, this structure stays pretty consistent across patterns.
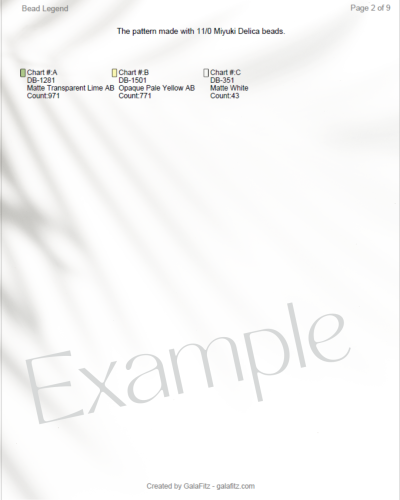
The Bead Legend: Your Color Guide
Think of the bead legend as your translation tool.
Each color in the design is assigned:
- A letter (like A, B, C…)
- A specific bead type or code
- Sometimes the exact quantity you’ll need
How to Use It
Every time you see a letter in the chart or instructions, you refer back to the legend to know which bead to pick.
Why It’s Important
Different patterns may use different bead brands or sizes (like Delica vs round beads), so always check this section before you start.
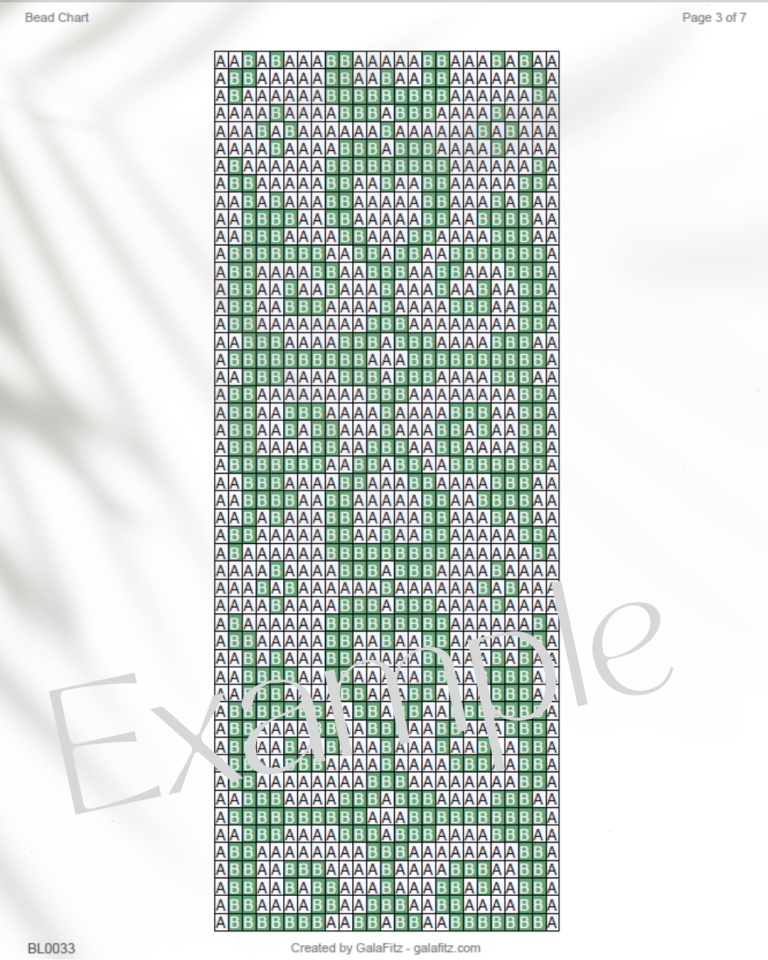
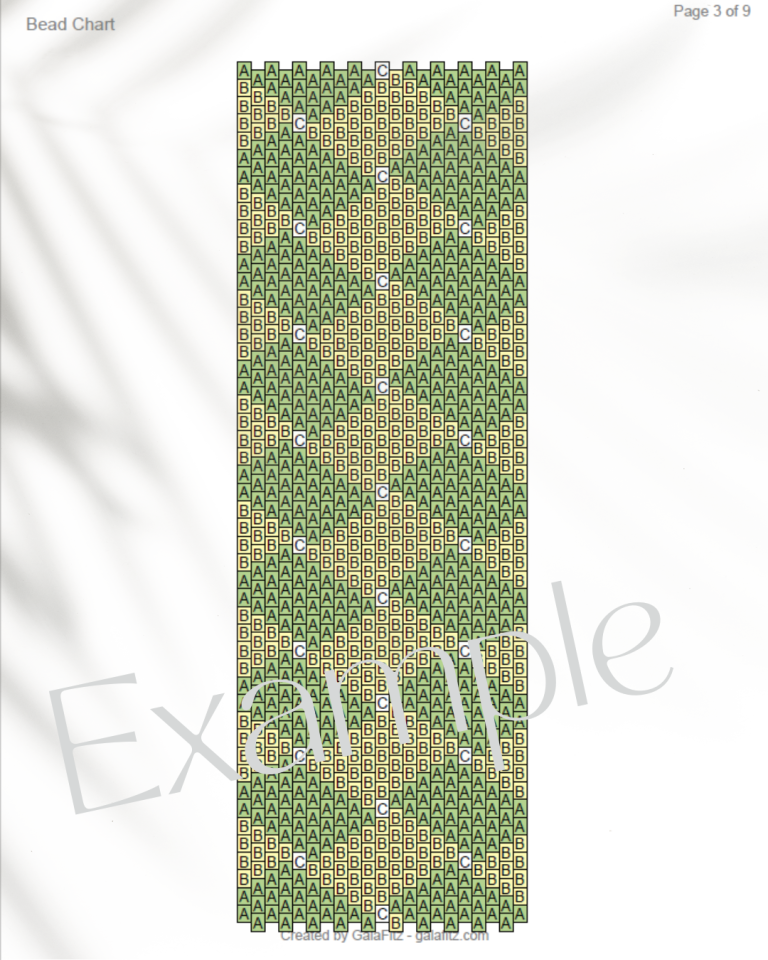
The Bead Chart: Reading the Grid
This is the part that looks like a mosaic or pixel art.
Each square represents one bead, and each row shows how your design builds step by step.
How to Read the Chart
- One square = one bead
- Each row = one row of your work
- Letters or colors show which bead to use
If you’re a visual person, this will probably be your favorite part of the pattern.
Loom vs Peyote
- Loom patterns are usually straight rows
- Peyote patterns may look slightly offset (like a brick pattern)
The chart reflects the technique, so the layout might look different depending on the stitch.
The Word Chart: Step-by-Step Instructions
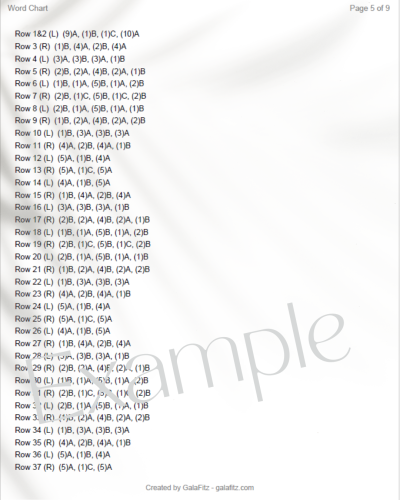
If the grid feels overwhelming, the word chart breaks everything down into a sequence.
Instead of squares, you’ll see something like:
- (5)A, (3)B, (10)C
How to Read It
- (5)A = use 5 beads of color A
- Follow the sequence in order
- Each line = one row
When It Helps Most
- When you want to count beads precisely
- When working on long rows
- When you prefer structured instructions over visuals
Should You Use the Chart or the Word Chart?
Honestly, most beaders use both.
- The chart helps you see the design
- The word chart helps you stay accurate
Switch between them depending on what feels easier in the moment.
Key Details to Check Before You Start
Before you thread your needle, take a minute to look at these:
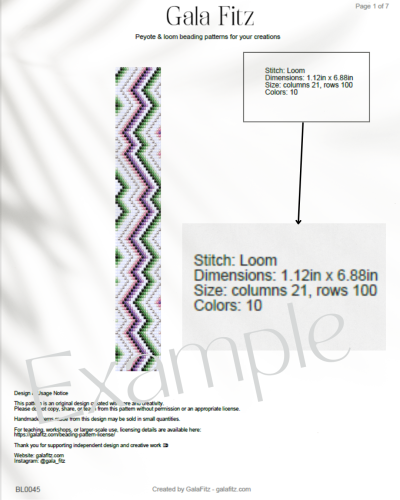
Size and Dimensions
This tells you how big your finished piece will be—important for bracelets, cuffs, or straps.
Technique
Make sure you know whether it’s:
- Loom beading
- Peyote stitch
- Or another technique
Each one affects how you follow the pattern.
Number of Colors
More colors = more complexity. Beginners might want to start simple.
Helpful Tips for Reading Patterns
Getting comfortable with patterns takes a bit of practice, but these tips make it easier:
- Mark or highlight each completed row
- Double-check before moving to the next row
- Keep your bead legend visible at all times
- Don’t rush—accuracy saves time later
- Start with smaller designs if you’re new
At first glance, a beading pattern PDF might look complicated—but it’s really just a well-organized system. Once you understand how the legend, chart, and word instructions work together, you’ll be able to follow almost any design with confidence.
Ready to Try It Yourself?
Grab a pattern, lay out your beads, and take it one row at a time. You don’t need to be perfect—you just need to start. Your next beautiful piece is already waiting in that chart.